Josh's Boat Page
Work Blog
Friday 28th August
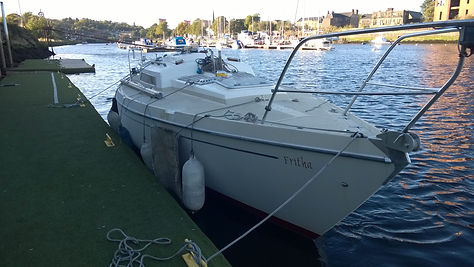
Friday was a very special day for me, it was the date things would get going. The transporter had picked up Fritha from Neyland the day before and had driven through the night to arrive at Sandpoint in the morning. I got the morning train to Dumbarton, carrying my heavy toolbox and other esentials in my backpack.
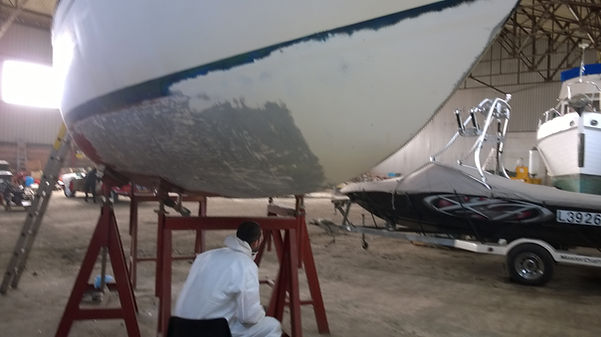
Upon my arrival Nick was already waiting for me and the marina had everything set up to lift the boat off the trailer and onto a cradle.

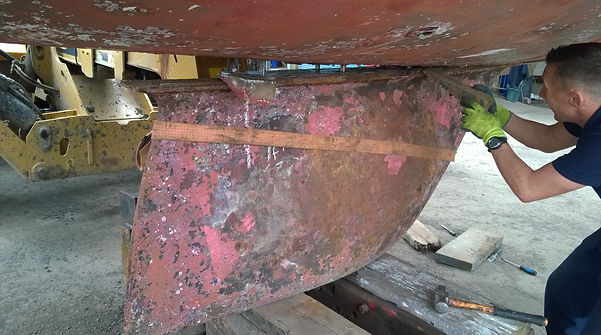
Once Fritha was safely on a cradle I could get to work. The first task was to survey the underwater section in detail and write down any complications that could occur during the refit. Although I looked long and carefully, I couldn't find much damage but could ascertain that some previous owner had at some point coated the hull with Gelshield or some similar paint. Water under this paint was causing the paint to bubble, causing an osmosis like appearance. This is excellent news, but it does not save the need to sand down all the paint to bare gelcoat to make the new paint adhere properly. The only damage on the whole underwater hull is on the rudder skeg, where the gelcoat has rubbed right back to the bare fibres for no obvious reason. However, this damage also is just superficial, it is completely dry and after being filled will be as good as new.
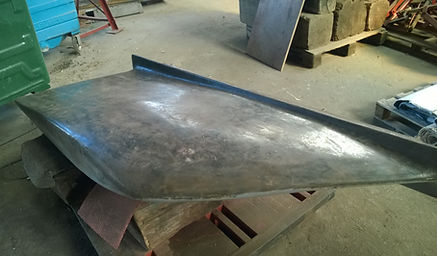
The keel however was a bit worse for wear. It has pitting in many areas and will need a lot of care and attention to sand, grind, filler, sand and coat and so get it back to it's original state of hydrodynamic majesty.
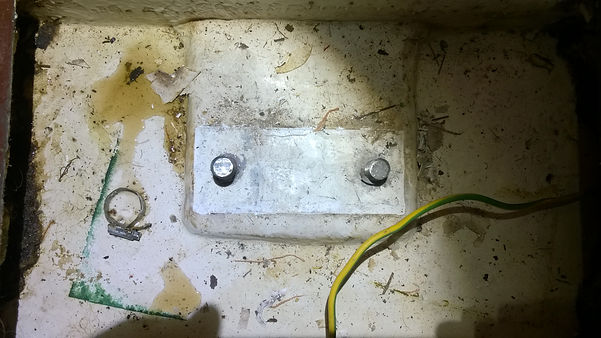
The next task was to survey the keel bolts. Obviously these need to be removed to be able to remove the keel and so I decided to see what state they were in and whether I could remove them with tools from my toolbox. As it turns out with a bit (or a lot) of effort and a 30mm socket and rachet the nuts came undone and I could remove them. Here, once again, the virtues of a Dutch built yacht came to the surface. The nuts and bolts and keel plates looked like they had been put on yesterday, with the exception of the forward ones which are in a comparment which is sealed. The sealant was still rubbery, flexible and needed some pursuading to come off. This, combined with the fact that the keel is held on by no less than 10 M20 keel bolts just strenghthens my trust when sailing this boat.
The final tasks of the day were to remove some deck hardware that was causing problems and leaking. Now that the boat will be indoors for a few weeks it is a good idea to remove the fittings to let the core of the GRP to dry, before refitting the hardware just before she is launched.
Once this was done I returned home in a very tired, muscle achy but happy manner! On Monday the keel will come off and the major work can start.
As a note to any boat owners with leaking deck fittings, I can only recommend you remove them as soon as possible. Preferably in summer when it is warm and obviously in a dry spell or undercover. The point is to let the core dry before the hardware is resealed. Not doing this could result in major problems later down the line. Having a rotten core is nothing good and repairing this can be very tedious. The core of the boat provides strength and stability so maintaing its integrity is most important.
Monday 31st August
Monday was another interesting day, after driving around picking up the necessary items, tools and equipment from various places I headed over to Sandpoint and arrived at lunch time. Luckily the marina staff didn't have much on and so they agreed to remove the keel at 1300.
Before that there were many things to get done so as to allow for a smooth and quick removal of the keel, or so I though at least. A bolt in the tiller block had to be drilled out and the keel nuts just loosened a bit. Once this was complete she was hoisted up and taken out of the shed.

The next step was to drop the keel. To do this the teleporter was driven into position, with a pallet and blocks of wood just under the keel. The idea was to lift the pallet up until the keel was resting on it, remove the keel nuts and the drop the keel slowly. The first part was easily achieved, but once the pallet was lowered the keel remained firmly stuck onto the boat. 1.8t of cast iron hanging on with epoxy and silicon, a very impressive sight.
However, it wasn't any good, the kel had to come off and so we got to work. With the help of Euan and other yard workers from Sandpoint, 4 wooden chocks, 3 chisels, two sledge hammers and a crowbar as well as a huge effort and 40 minutes later, the keel finally gave up and with much cracking slowly dropped off.
Again I was very impressed with the build of these yachts. The keel is not just butt joined onto the hull and held fast with bolts, it sits in a recess in the hull which ensures more stability and security of the keel bond and, as we saw, would even hold the keel on if all the keel bolts failed (of which there are 10 M20 bolts as I have already mentioned!). With the excitement over the hull was taken back into the shed where the rudder was removed while the keel was laid down on its side.
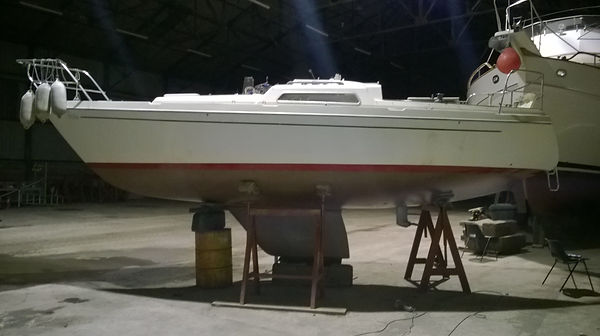
That Monday I left Fritha looking a bit folorn, propped up in four A frames with the keel placed next to her. I felt sorry looking at her, but all being well in a few weeks the process will be reversed and Fritha returned to her former glory.

Tuesday 1st September
After advertising to my friends how much fun it is stripping antifouling off a yacht, one of my friends, Petro, decided to have a go at it and agreed to help me. We met outside my flat at 0900 and headed off to the boat. We realised he had no PPE, so we went to Screfix to fix him up with the necessary bits and pieces before returning to the boat to start work. Petro did an excellent job helping me and although it can't be said that it was a terribly exciting day, we did get the antifouling scraped off the starboard side and also managed to sand half that side down to bar gelcoat.
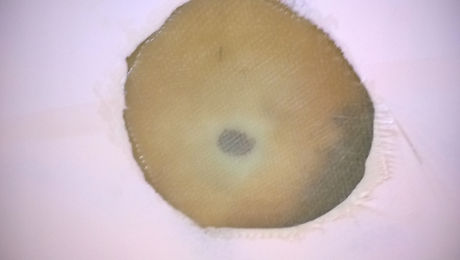
Digging so deep into the fabric of a yacht also reveals a lot about the boat's history. I can now say that one of the previous owners did the same as we're doing but had little experience. In some places the original gelcoat is missing completely and the GRP is visible. Although this was covered with some form of 2 component paint, the paint was very thin and we are lucky that water did not manage to penetrate into the fibres. Also some repairs, mainly on the rudder and skeg were attempted, but not as well as it should have been. Big holes in the rudder and skeg were not repaired with GRP as they should have been, but were just filled with filler and painted over. Obviously these repairs will be removed completely and then repaired with glass fibre and epoxy.
Another interesting factor are traces of wicking, which is probably the reason the previous owner did the work he did.
In all it was a good days work, we achieved a lot and at the end could feel every muscle in our body. I can say it's the first time I'm happy my girlfriend isn't around as I smothered myself in Deep Heat. It is nice typing this, feeling the warmth of the Deep Heat and not having Sarah moan at me for spreading the smell throughout the flat.
Wednesday
3rd September
On Wednesday I found myself alone again and got to work scraping the rest of the antifouling off. It's hard work and nothing I want to repeat in a hurry. Thanks to a carbide tungsten scraper, especially designed to scrape paint of surfaces, the task didn't take as long as it could have. After a morning of scraping the last scrap of antifouling fell to the ground and the next step could be approached. This included using up several packets of sanding discs and about 12hrs of sanding. As this task is very dull I also ground the sections that needed GRP repairs. It is very scary taking a grinder to any yacht but it had to be done.
In all Wednesday was an extremely long and very tiring day, but very satisfying to get all the horrible antifouling off the hull.


Sunday
6th September
After two days of real work (the kind that you actually get paid for!) it was back to work on Frith again. This time I had two helpers, Petro joined me again and Gina from Gaelforce decided to use Fritha as a base to learn how to do GRP repairs. The first step was to clean off the repair patches and grind some more material off to make the repair easier. Then the different layers of glass matting were cut out, ready to be applied.
For GRP repairs on Frith I used West Systems Epoxy, personally I don't think there is much better out there although some may argue with me on that. It is important to remember that Epoxy will create a strong bond with Polyester base material, however Polyester will not bond with Epoxy base material. In any case if you want the repair to last long and be strong, use epoxy!
Once all the layers are cut out and laid in order, the epoxy can be mixed. West Systems provides pumps which you screw on the top of the bottles, which makes mixing unbelievably easy, the mose tiring part is thoroughly mixing the epoxy. The layers for one repair are the saturated in epoxy, you know they are saturated when the glass mat is see-through, the saturated mats are then laid onto the repair, positioned where it should go and then rolled on with a special GRP roller made of metal. This ensures the bond will be strong and there are no air bubbles in layers. I generally say up to 7 layers of glass matting can be layed up, depending on the thickness of the mats. The problem with epoxy is that during the curing stage it gives of a lot of heat, so much that a plastic yoghurt pot with a medium amount of epoxy curing in it will melt.
There were six repairs to do on the hull, two major ones to reinforce the cockpit drain skinfittings, one to close the holes where the analog log used to sit and one to close the hole where the gas locker outlet sat. The other two were minor repairs on the rudder skeg.
The repairs took a fair amount of time to do and we didn't manage to get the full thickness needed to complete the repairs which will mean coming back to carry on.
Monday
7th September
&
Tuesday
8th September
Monday and Tuesday were more days of real work, but that didn't stop me from working on the boat afterwards, the GRP repairs needed to be completed. The same procedures are followed as on the Sunday, however as the holes are already closed and the GRP applied Sunday was hard applying the additional layers was easier. With the repairs completed I could go home, once again very tired.

Wednesday
9th September
&
Thursday
10th Septmber
Now that the GRP repairs had been completed, they could be sanded smooth to follow the curves of the hull. This was done with a mix of orbital sander and a sanding batten to make sure the repairs did follow the curves as closely as possible.
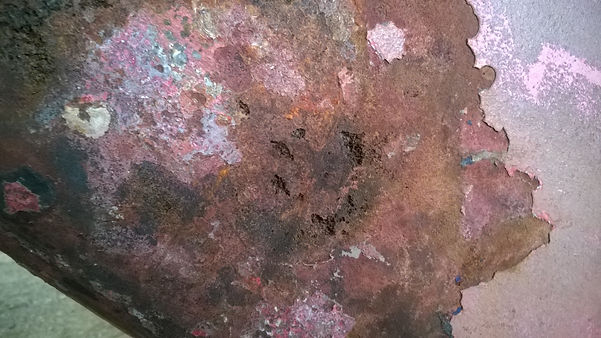
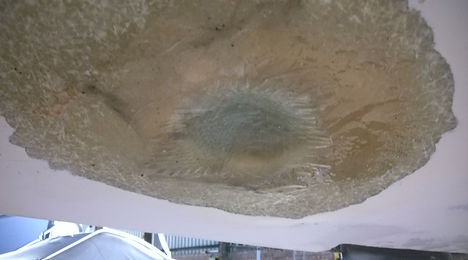
After sanding the repairs another very tiresome job had to be done; due to the thiness of the gelcoat in some parts, the dry fibres underneath caused it to crack, very minute cracks which are very difficult to see. The trick is to remove all the dry fibres, making the surface as firm as possible for the paint to adhere to. This job took me the rest of the Wednesday and most of the Thursday. This was by far the most strenuous task, even worse than scraping or sanding and took me 15 hours on Wednesday and another 13hrs on Thursday.
The result looked painful as the whole hull looked like the picture below.

Friday
11th September
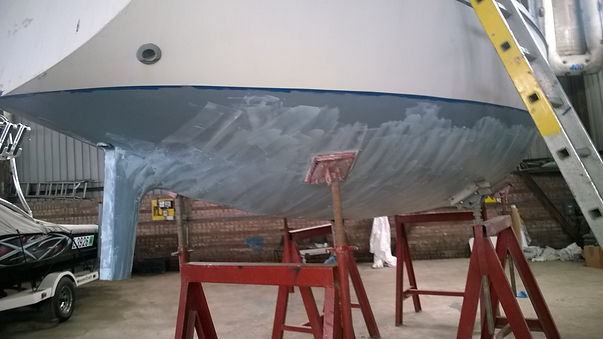
Removing all the dry fibres left the hull in a sorry looking state and surprisingly the first step to remedying this was not to filler the hull, but to paint a layer of Gelshield on. This saturates any dry fibres that may be left and also gives the Watertite (an epoxy based filler designed to be used for underwater fillering) something to hang onto. The first layer to go on was grey and made the hull look quite good when viewed from a distance.
In the late afternoon I moved onto the keel. This was more time consuming than originally thought. In parts all the coating had come off, revealing bare corroded steel and some severe pitting in some places. The rest was covered in some wierd soft lead kind of coating, then some strange primer and finally many layers of antifouling. Obviously all of this had to come off, which was achieved with the help of a metal brush for an angle grinder. Having removed all the horrible stuff the next step was to use a flap disc (or to be more accurate several flap discs) to grind down the metal until it had a nice uniform shine. Interprotect was then applied to the bare metal.


Saturday
12th September
Saturday was a busy day and although a lot of work was done it won't take long to write about it. It involved fillering the hull an keel using Watertite. The first layer was put on in a downward stroking manner so all the filler collected at the bottom of the holes, leaving a smaller hole at the top. Once the whole hull had the first layer of filler on it I took the chance to explore the surrounding area and walk around Dumbarton castle. After meandering around for a while I got back to the shed and put on the second layer, this time in an upwards motion, filling the holes left from the first layer. I left Frith that evening with 2kg of filler on the hull and keel.
Sunday
13th September
The funny thing with filler is that you put it on and then sand most of it off again. Sunday was another day of hard work which can be described in one word: sanding. The hull had to be sanded yet again, this time with a very satisfactory result, if not to look at then to feel. The hull was very smooth after 13 1/2 hrs of sanding. It caused me pains in my back, numb hands, red eyes and basically tired me out like I never have been. The very last job of the day was to water down the hull to remove the dust that had accumulated, ready for painting.
Thursday
17th September
So apparently this working for money thing is an ongoing matter, the more you work the more money you get. This was good for me as it means I get more money to spend on Frith. However, 8hrs working in a chandlery on Monday, then travelling to Amsterdam on Tuesday and coming back Thursday meant I had no chance to work on Frith on those days. However, Thursday afternoon saw me back working on her, this time with the straight forward task of painting the keel and hull. This time the hull was painted green, we have to keep things interesting after all.

Friday
18th September
to
Sunday 19th September
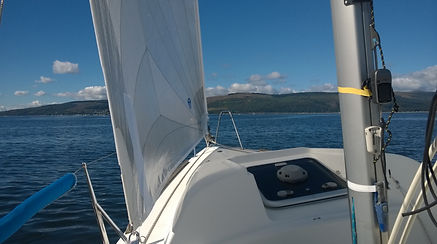
Friday I took a day off working on the boat and went for a sail. Alistair, who owns a Beneteau First 7.5 had just recieved brand new laminate sails and this was the day we would try them for the first time. For this occasion the North Sails rep was also on board, setting the boat up properly and showing us how to trim the new sails to achieve maximum speed. It was great to get out, recharge the batteries and get more inspiration to get Frith back on the water. After a few hours sailing we headed back in and I returned to the boat to put another layer of Gelshield on.
Saturday was another full days work, more gelshielding was on the cards for the hull and the keel was sanded smooth and all coatings removed from the propellor and prop hub. All three then recieved a layer of Interprotect.
Sunday was another boring day with just painting on the cards.

Tuesday
22nd September
Tuesday was a normal day. I am sure I was loosing my sanity at that point, too many hours of sanding and painting on my own had given me the illusion that I had a team of people working for me, who needed constant supervision. Luckily I wasn't going to give in and let my imaginary team sit around, there was work to be done!
The first task on the agenda was to get the Sandpoint team to flip over the keel in the morning and I set to work removing all the gunge from the untreated side of the keel. Again it as an uncomfortable task of removing the evil stuff that was on the keel. I still have no idea what the keel was coated with, but it took a metal brush on the grinder and a lot of work to get it off. It seemed to melt when removed by the brush and left a terrible smell. After the brush a sanding flap disc was mounted to the grinder and the whole surface was sanded until an even shine was achieved. Once the dust had been removed the whole side of the keel, the top, bottom, front and back of the keel were Interprotected.
While waiting for the piant to dry I went shopping for lunch and did some work inside the cabin. Before heading home that evening I applied a layer of filler to the keel.

Wednesday
23rd September
Getting near the point of reattaching the keel is very nerve wracking, your mind spins with the jobs still to do and it seems a constant struggle to remember exactly what needs to be done before the keel can be put back in its rightful place.
Sam and I returned on Wednesday to get some major work done to both the hull and the keel before the big day. When I say major work, it was more very small areas that took us a big step to success. Sam sanded the keel as soon as we arrived, applying a layer of Interprotect once it was smooth while I applied another layer of Gelshield to the hull, pausing halfway to take picutres of a green/grey hull. Decide for yourselves what you think looks better!
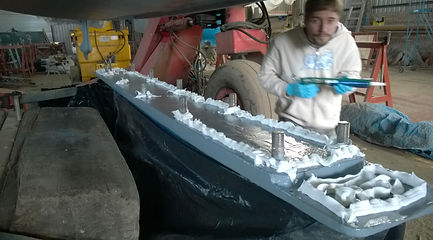
In the afternoon we were able to start something I had been dreading, and thus left in Sam's capable hands. The keel needed another hole to accomodate a new M12 keel bolt. This bolt does not serve a structural purpose, it only holds the aft end of the keel to the hull, avoiding excessive flexing in this area and so preventing the sealant from disappearing.
The first step was to create a drilling template, this Sam made out of a piece of wood, with a hole drilled at the exact height of the centreline of the keel. This wood was then placed on the floor so that the hole was in line with the position of the new keel bolt. It was then an easy but very long task of drilling a small pilothole which was then enlargened in steps. Brand new HSS drill bits and Sams steady hand did a fantastic job.
While Sam was busy drilling, I got dressed up in a full body suit, goggles and a respirator, which shocked one of Sandpoint's berth holders who had been giving us helpful hints along the way. Once he saw a large plume of dust coming out of the cabin he understood the need for such equipment. This dust originated from the bilges, where I was busy grinding the hull down to bare GRP, through several millimeters worth of Danboline and Gelcoat.
As it turned out it was a very bad idea to do this without emptying the cabin of its contents as the dust settled everywhere, leaving the cabin with a heavy layer of dust covering everything. The worst part is dust gets everywhere, into every nook and cranny. However as the boat is going to have a major cleanup anyway this did not matter. The result was a neat square ready for the hull stiffener to be laminated in.
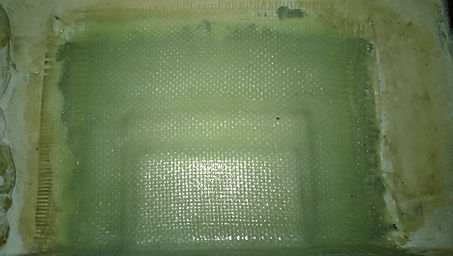
The hull stiffener consists of 2 layers of 6mm marine grade plywood, cut to size and then glassed over with 9 layers of 300gr/m² glass cloth. This should be sufficient enough to transfer the loads from the new keel bolt into the hull.
After I had finished Sam allowed me to cut the M12 thread using a 3 stage tap and plenty of cutting oil. After some difficulties with the tapping wrench we found a suitable subsitute and I was able to cut the thread in slightly over one hour.
At the end of the day we went home tired and ready for Thursday, which would bring a major milestone with it.


Thursday
24th September
After a long and exhausting day on Wednesday, I was the first to arrive at Fritha on Thursday. There was still a lot to do and I was exciting to see the boat at the end of the day. After cleaning out the hole we had drilled and tapped the day before I cut the new keel bolt to length, deburred the ends and after smothering the tip in ultra strong Loctite I screwed the bolt into position, tightening it up as much as I could.
The hull stiffener had dried completely and so everything was in place to get the keel on. Euan and his team lifted the boat at 1200 and positioned the hoist in the middle of the shed. Sam arrived shortly after and together we went through the process of reattaching the keel. Euan outlined his plan: secure the keel onto the telehandler which would then position the keel under the hull.
Lifing the keel was relatively easy, padding it with carpet on the pallet before setting it down in an upright position. Unfortuntately the paint was slightly damaged while driving a chock in to stabalise the keel, but nothing major. Pat at Sandpoint suggested making up M20 studs to go on top of the keel bolts to line up the keel and promptly went about making these up. As it turned out they made the task much easier.
Positioning the keel under the hull was precision work and Sam and I were very impressed by the the abilities of Gordon driving the telehandler to move the keel with millimeter accuracy. Once it was lined up we dared to slowly lift the keel until the guide bolts were inserted into the keel. A drop of paint on the new keel bolt transferred onto the hull indicated where the hole should be drilled and after dropping the keel Sam got to work. FIrst he drilled a pilot hole, and then widened the hole to 16mm from the inside. To check that the keel would fit it was lifted into its final position without silicone and as it turned out, everything lined up nicely. Once this was complete the bonding area was primered with Sika primer and left to dry.
After a break the Sandpoint crew returned and we proceeded to cover the keel with plastic bin bags to protect any silicone dripping onto it. The keel was then covered with Sika 292. After watching us struggle Pat suggested placing the silicone in hot water before using it. This greatly eased the task of applying the silicone and we managed to empty all seven of the tubes onto the keel, making it look like a nice birthday cake.

Once the keel had been coated in silicone the keel was again lifted into position, this time the silicone acted as a barrier and so the telehandler started lifing the whole boat; it was time to put the keel nuts on and tighten them up. This I did while staying in contact with Sam through the hole that is normally the sink skinfitting.
The nuts were tightened to get the keel straight each way and then tightened some more to ensure the silicone would create an even layer of sealant. Sam then went around with a squegee and smoothed out the oozing silicone. As it turned out 7 tubes were enough, however it did leave gaps which would later need to be filled with silicone 291. This was nothing major though and the 292 would have been sufficient to make the boat watertight.
Removing the plastic was great, finally seeing the boat as she should be for the first time in weeks. While the Sandpoint crew secured the hoist to hold the boat for the long weekend Sam and I enjoyed the first result of our efforts.
Before heading home the whole keel was treated to another layer of Interprotect.

Friday
25th September
After such a major milestone it was easier to get back to work, the end was slowly coming into focus and Sam and I were already making plans for taking Fritha down to Greenock. I stopped by Gaelforce on the way to the boat to collect some Sika 291 to finish the hull keel joint.
On Friday Sarah and Sam were there to help, while Sarah and Sam emptied the cabin and started cleaning I got down to scraping and sanding the old pad positions. It was gutting to go back to this boring work, but with so little to do it the sanding was completed in under an hour. I decided to apply the filler directly to the hull without applying a layer of Gelshield. Once this task was completed Sarah took the dogs to the park while Sam started applying the Sika to tidy up the joint, unfortunately having to leave before he could fully complete the job. I then had the task of getting the joint as good as I could, considering Sika sticks to anything, even the tools you are trying to smooth it with.
Before Sam got stuck in the cabin he helped me get the mast off, laying it on some trestles so I could check it over and do some necessary maintenance on it.

Saturday
26th September
Sam and I arrived at the boat mid morning and noticed the filler the filler I put on the previous day did not fill all the holes; another layer was needed. I mixed up the last scraps of filler and applied it to the hull, again happy that my calculations of materials needed had been spot on.
The guardrails were looking tired, the lower wire had eaten through the stantions and we deemed the unsafe. Also the stantions, which are made out of aluminium, had correded onto the stantion bases, which were stainless steel. This meant we had to remove the whole thing and so the need to replace the guardrails was apparent, especially with the sailing I intend to do.
Furthermore, on being delivered to Wales, a hopeless boatyard had moored up Fritha onto a drying jetty. At low tide she had keeled over, putting all her weight on to the guardrails on one side, causing some damage the the deck. My dad had patched this up well, but as Frith was in a shed we decided to make the most out of it and conducted a more in depth repair.
Other deck hardware was removed, the vents and ubolts, all of which had a tendency to leak.
Once the filler had dried we sanded this and applied a coat of Gelshield onto the old pad positions. We also tightened the keel nuts, not that there was much give in them, but rather safe than sorry, and coated the keel in yet another layer of Interprotect.


Monday
28th September
Sunday we decided to have a day off, a well needed rest and also a chance for the silicone and paint to fully harden before we applied Coppercoat.
Monday was a slow day, we arrived late and checked over the boat. With the original idea of just coating the new pad positions with Coppercoat we mixed a small batch to start. This went on in a very strange manner. Being used to Interprotect and Gelshield, which achieve 100% coverage with the first coat, Coppercoat does not cover well at all. We tried putting more on, but that made it much worse. A phone call later we were the wiser, and had a change of plans. It turns out the first layer of Coppercoat is applied with a coverage of 20% to 30%, not more, further more the coppercoat cannot be stressed for a further four days. With this in mind our original idea had to change, meaning we painted the whole hull, sparing out where the slings were as well as the old and new pad positions. This made the boat look very strange indeed but could not be helped.
Coppercoating is a long process and making the mistake of waiting too long before applying another coat, it took us until 0100 on Tuesday morning to complete painting. I left a note on the hoist to kindly ask Euan to put carpet under the keel to protect the coppercoat before heading home extremely tired.


Wednesday
30th September
University finally caught upt with life and so I decided I could not afford to miss any more lectures, hence Tuesday was spent at uni with one hour lecture and group meetings.
The whole time I kept on thinking about Fritha, would she be ok sitting in a cradle with her keel once more attached? I was sure Euan and his team had done a good job but couldn't wait to see her again. Wednesday I got up early and headed over, walking into the shed and seeing Frithat and another big surprise. Sitting right next to her was a Victoire 1122, the first I have seen in the UK.
Euan had placed Fritha on a cradle, putting thick carpet under the keel and on the pads which hold the boat up, I was impressed with their attnetion to small things like this. She looked quite patchy with a mix of Coppercoat, grey and green Gelshield showing but after applying the last layer of Gelshield to the old pad positions the boat looked a bit more uniform.
I also emptied the stuff from the cockpit and piled it into the car, more or less everything from the cabin was there and the car got very full with it all.
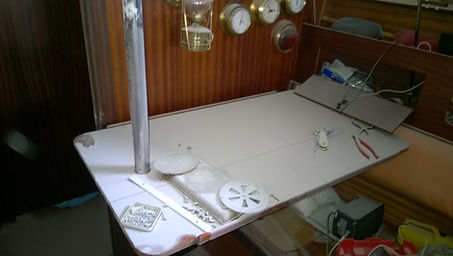
The rest of the day I spent making up pedestals for the windlass, chainholder and navigational instruments from a plank of teak I found on the boat. They turned out quite nice and I look forward to seeing them with several coats of varnish on them.


Thursday
1st October
Thursday morning saw me sitting in another lecture, but as soon as I could I got home, packed some thigns and headed to the boat. Arriving there I saw Fritha in her final resting place in the shed, chocked up on blocks of wood, some metal A frames and an oil barrel. As I had asked Sandpoint had chocked her up on the Coppercoat, enabling us to finish the job of applying the coppercoat.
As there was nothing I could do under the waterline that day I got to work filling the old stantion bolt holes with epoxy, and also epoxying the u plates that are situated in regular intervals along the footrail. These enable fitting a guardrail netting or can be used to tie down sails to the footrail so I thought keeping them was the best bet, however I was not happy in how they had been fitted, some of the screws were in scew and it just didn't look right. They came off and were refitted with a squeze of epxoy down the screwholes.
I also cleaned up any silicone which was left from removing the deck fittings, making sure we would just fit the new parts quickly.
Friday
2nd October
Again I had uni, lasting until 1600 in the afternoon. Sam and I had decided this was the last chance we would have of applying the Coppercoat and having enough time to let it cure before launching. Sarah and I headed over there as soon as I could, with Sam trailing behind after work.
It soon became obvious that we would not be able to complete the task in one session but we set the aim of getting sufficient Coppercoat on the bare patches to get it to the same thickness as the rest of the hull.
What took several hours to complete can be written in a few words: we mixed Coppercoat, applied it, mixed more and applied that until we had a consistent thickness of Coppercoat over the whole hull. By the time we had achieved this it was 1200 at night and we decided to leave the rest for Saturday.
Saturday
3rd October
Sadly I had to work on Saturday, leaving the task of applying the last coats of Coppercoat to Sarah and Sam. While I served customers all day they were busy working on Fritha.
After work I drove over to the marina, excited to see Fritha with her finished antifouling and I was not disappointed.
She looks good with the deep red colour of the Coppercoat and I was very happy with the result (and so hopefully were Sam and Sarah!)
Monday
5th October
Again uni beckoned on Monday, but with two hours of lectures in the morning, it still left me with plenty of time to work on Fritha and so I made my way there.
Todays jobs were quite simple, fit the skinfittings and apply the boot top paint. The holes for the skinfittings needed to be widened and while walking around the boat I noticed one hole I had forgotten about; the skinfitting for the NASA log had to be replaced as the old one had snapped while removing it. Luckily it was not too late to order the part using 24hr delivery and so a phone call to Force4 confirmed I would have the part on Tuesday. Happy that it would be there I carried on fitting the skinfittings I did have.
This was a complex procedure, the expensive Bronze skinfittings I had bought had a notch on them, meaning they would stop themselves from turning but also making it necessary to make grovves in the hull where these notches would sit in. This in itself was not easy and took some time to get the groves the right size without making them so big that the skinfitting would not cover them. Once each skinfitting was dry fitted tape was applied around the on the hull to stop the silicone from creating a mess and the skinfittings were removed. A large bead of silicone was applied around each head, and the skinfitting the pushed into the hole and into position. I could then screw the nut on, first hand tight and then using a large wrench to get some pressure on them. The oozing solicone was then cleaned up and the tape removed.
The two skinfittings for the cockipit drain required some more attention as angled backing plates had to be made up so the nut would sit on an even surface. The backing plates are made of 6mm marine grade plywood which are the sanded to the correct angel and a hole drilled through them.
Once all the skinfittings were installed I got on with the task of taping up the boot top. This took a lot of time, due to the fact that the line has to be straight and parallel to the waterline. Applying and reapplying tape, bit by but and standing back to survey the progress I managed to get a straight line, on I am proud of! 3 layers of International Perfection in "Chilli Red" were applied. The first application left me worrying, the colour was bright, more like fire engine red and not something I had wanted on my boat, but as the layers dried the colour became darker until it was the colour I had hoped for. After the last layer I carefully removed the tape and stood back to enjoy Fritha looking stunning! I was a bit disappointed in the tape, the thin Perfection had managed to seed under it in some places, but standing a few mweters away it was hardly visible and so I did not try and remedy it.
I left the marina early evening, looking forward to showing Sam the work I had done the next day.

Tuesday
6th October
Tuesday we didn't have too much to do, the most important factor being fitting the NASA log skinftting. However, upon arriving home after working at the Naval Architecture Career fair I found a note in the post box saying the delivery driver had already been and he had not even been capable of filling out the "missed you" card in the correct way. After trying to track my parcel on the internet with no result and phoning several numbers apparently belonging to UKMail I was still no further to being able to pick up my parcel that day. In a state of growing anxiety I rang Force4 who were more than helpful, they rang UKMail who in turn then rang me to inform me I could pick up my parcel that evening from their depot. As it had to be done I left the house at 1900, picking Sam up on the way and heading over to UKMail to pick up the very important skinfitting.
Arriving at the boat much later than we had hoped we fitted the sknifitting and then proceeded to fir the seacock before running out of PTFE tape.
As there was not much more we could do we drove home, the whole time reminding each other what had to be done the next day.
Wednesday
7th October
It is funny how things in life seem to go wrong and then by some miracle come together better than you could have imagined. Wednesday was a good day, it was the seventh day of the month, seven being my lucky number. The sun was shining, it was warm and I had no lectures. I arrived at the boat early to g do some final preperations. The saildrive anode had to go on, the prop and hub had to follow, the rudder had to be installed and the rest of the seacocks fitted. Passing Gael Force on the way in I picked up more PTFE tape, enough to get the job doen with loads of spare.
Fitting the Seacocks was easy, plenty of PTFE tape, tighten by hand and then add a few turns with a wrench. The prop needed more attention, the anode was simply srewed on, the shaft had to be greased before the prop was pushed on and the prop hub screwed on. All that was missing was a stainless steel bolt to stop the hub unscrewing and this involved a trip to Fynepax.
Sam arrived mid morning and shortly after Euan and his team lifted Fritha one last time. She was left in slings for a few hours, mainly to wait for the tide to rise but also to let us complete the jobs. The rudder was fitted with enough grease on the shaft to make it slide in easily and Sam started abrading the Coppercoat to reveal the copper within.
Around 1600 the hoist was set in motion and the procession slowly moved towards the ramp, with Sam running along beside the keel doing som last minute abrading.
It was a very big moment, turning the corner onto the ramp where Euan said I could get onbaord, climbing up the ladder on the moving hoist. Once on board Sam joined me and we prepared everything for the first launch since the refit, checked and double checked the seacocks, connecting the battery so we could start the engine and so on. The first watering was nerve wracking, Sam and I ran around checking for any water ingress while Fritha was still held be the slings. After 15 minutes no water had been sighted in the bilges or anywhere it shouldn't be and so the slings were removed and Fritha ted alongside the pontoon.
She was on the water for the first time in months, having the keel removed and replaced, and all skinfittings replaced and not a drop of water had got in, I was very pleased with the work done.
The engine also started on the first go, a very good sign and so we let it run while we tackeled the next big step; stepping the mast, which the guys did very expertly. WIht the mast on Fritha already looked much better, but still has a lot of work to follow.
As another boat was waiting to be hoisted out of the water Sam and I slowly headed down river, giving us time to set the boat up with mooring ropes and fenders to enable us to raft up next to another yacht before heading back upriver to the marina. We rafted up next to a motorsailor and did some small tasks before heading home for the night.